Meet Tableo’s new floor map: built for the pace of restaurant service
A guest is waiting at the door. You need to know where to seat them, whether that table has another booking, and anything your team should know before the guest sits down. Tableo’s new floor map brings those decisions together in a redesigned experience built for live restaurant service.
We’ve rebuilt the floor map around simplicity, ease of use and a clearer view of what’s happening in your restaurant. From seating a walk-in to moving a booking or checking the next arrival, the everyday actions are close to the tables you’re managing. The aim is practical: help your team read the room and manage it without making the software the centre of their attention.
During service, time spent searching for a booking or scrolling through a wrong page is time your guest spends waiting. We want your team to get the information they need quickly, make a decision and get back to looking after the room.
“We had a good floor map, but good wasn’t enough for the standard we want Tableo to meet. During service, every second matters. We wanted to make the experience simpler and clearer, so teams can spend more time looking after their guests. We’re striving to build the best floor map because our restaurants deserve the best.”
Ben Vincenti, who spearheaded the project
A quick tour of the new floor map
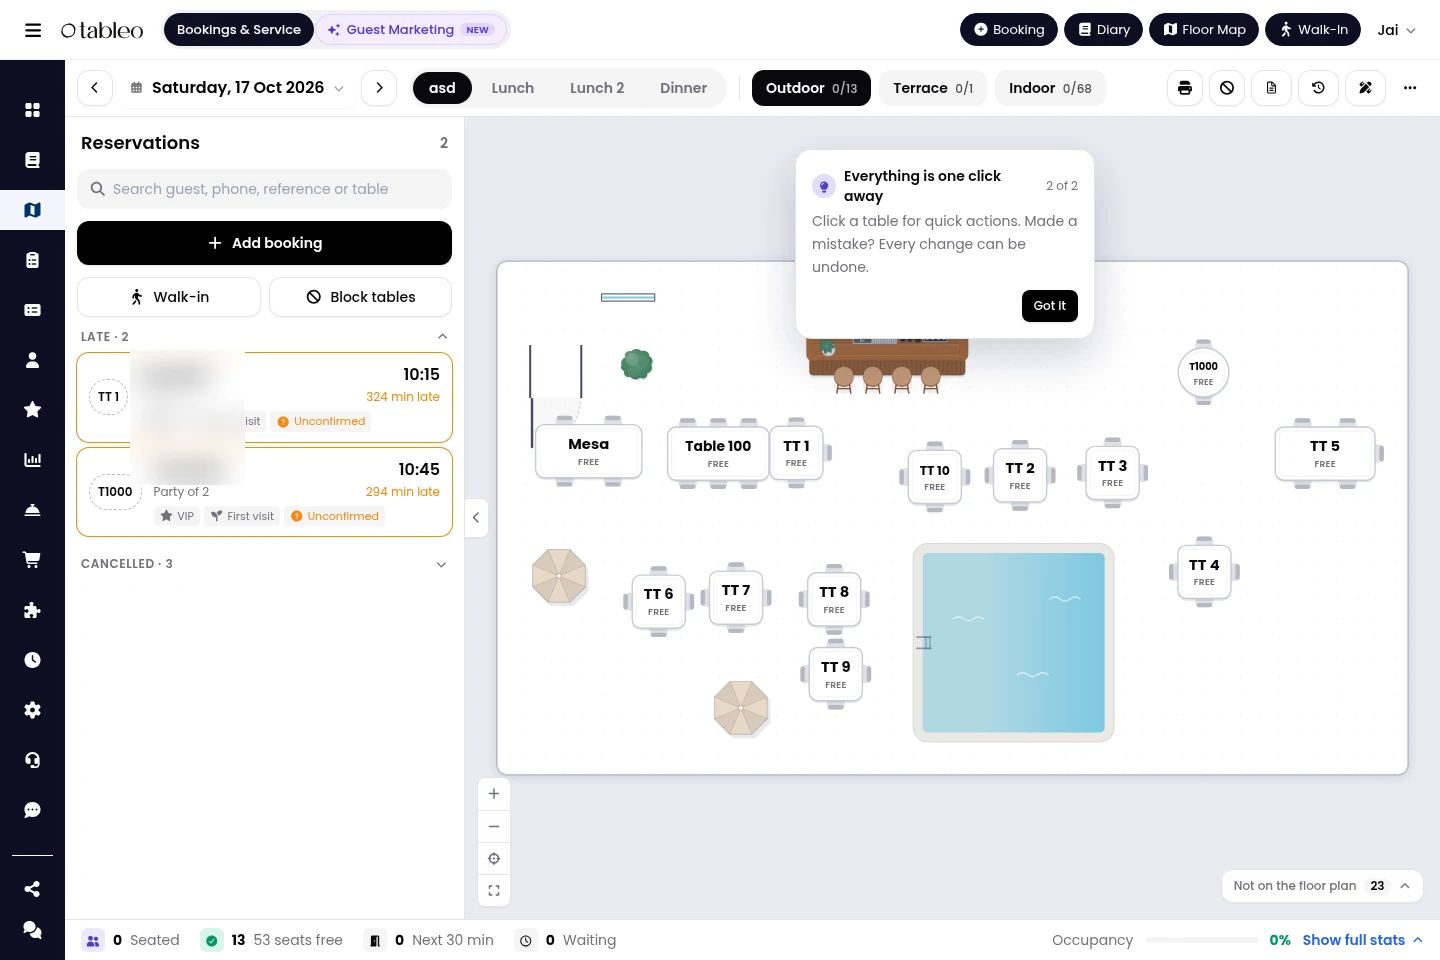
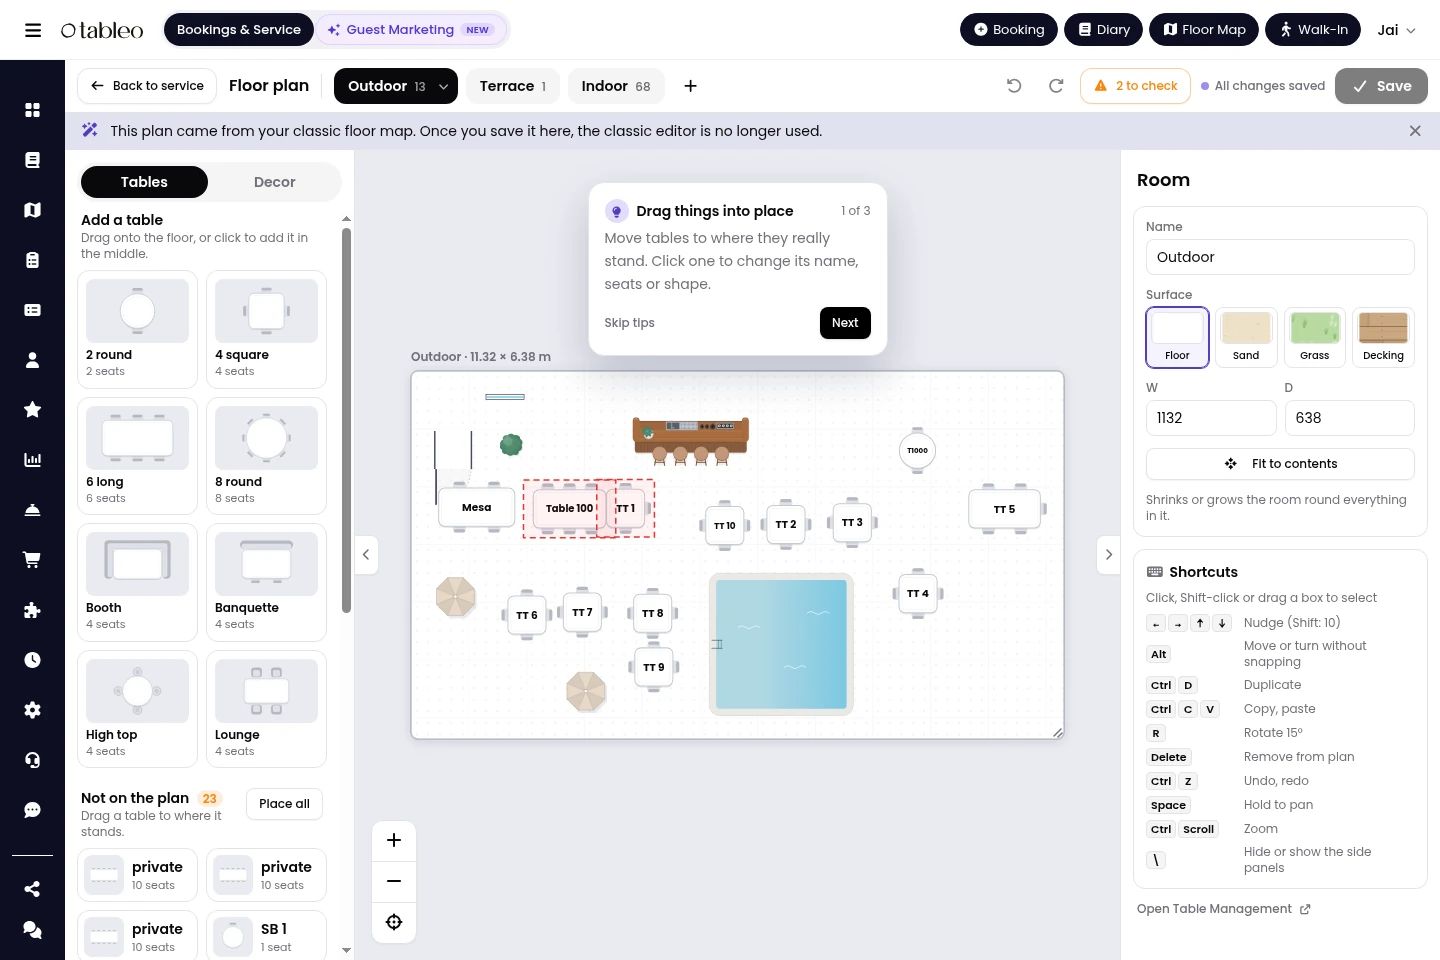
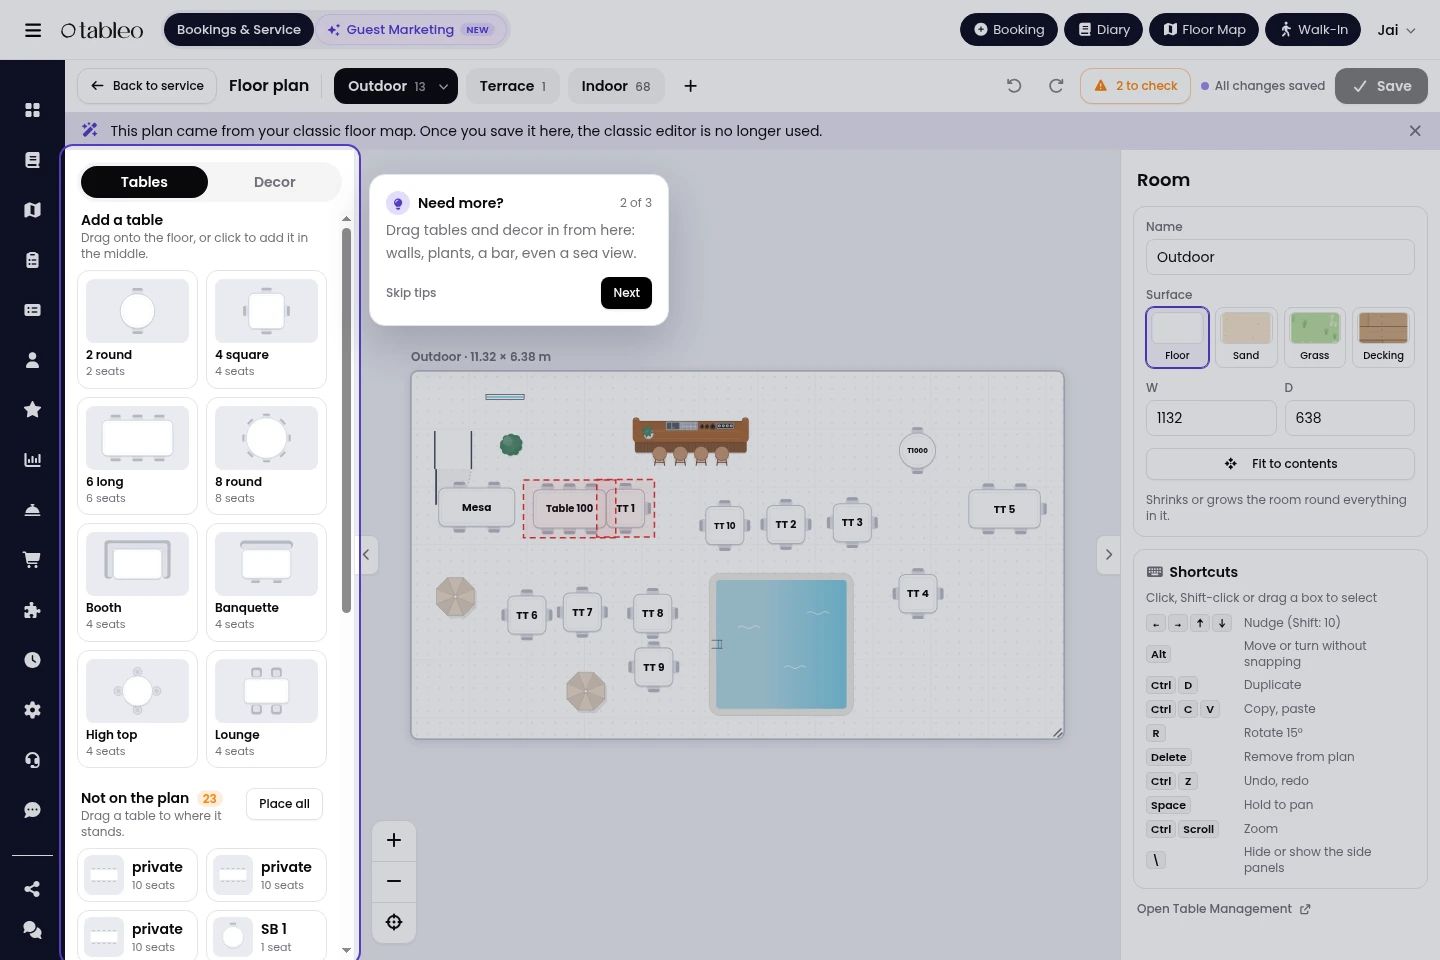
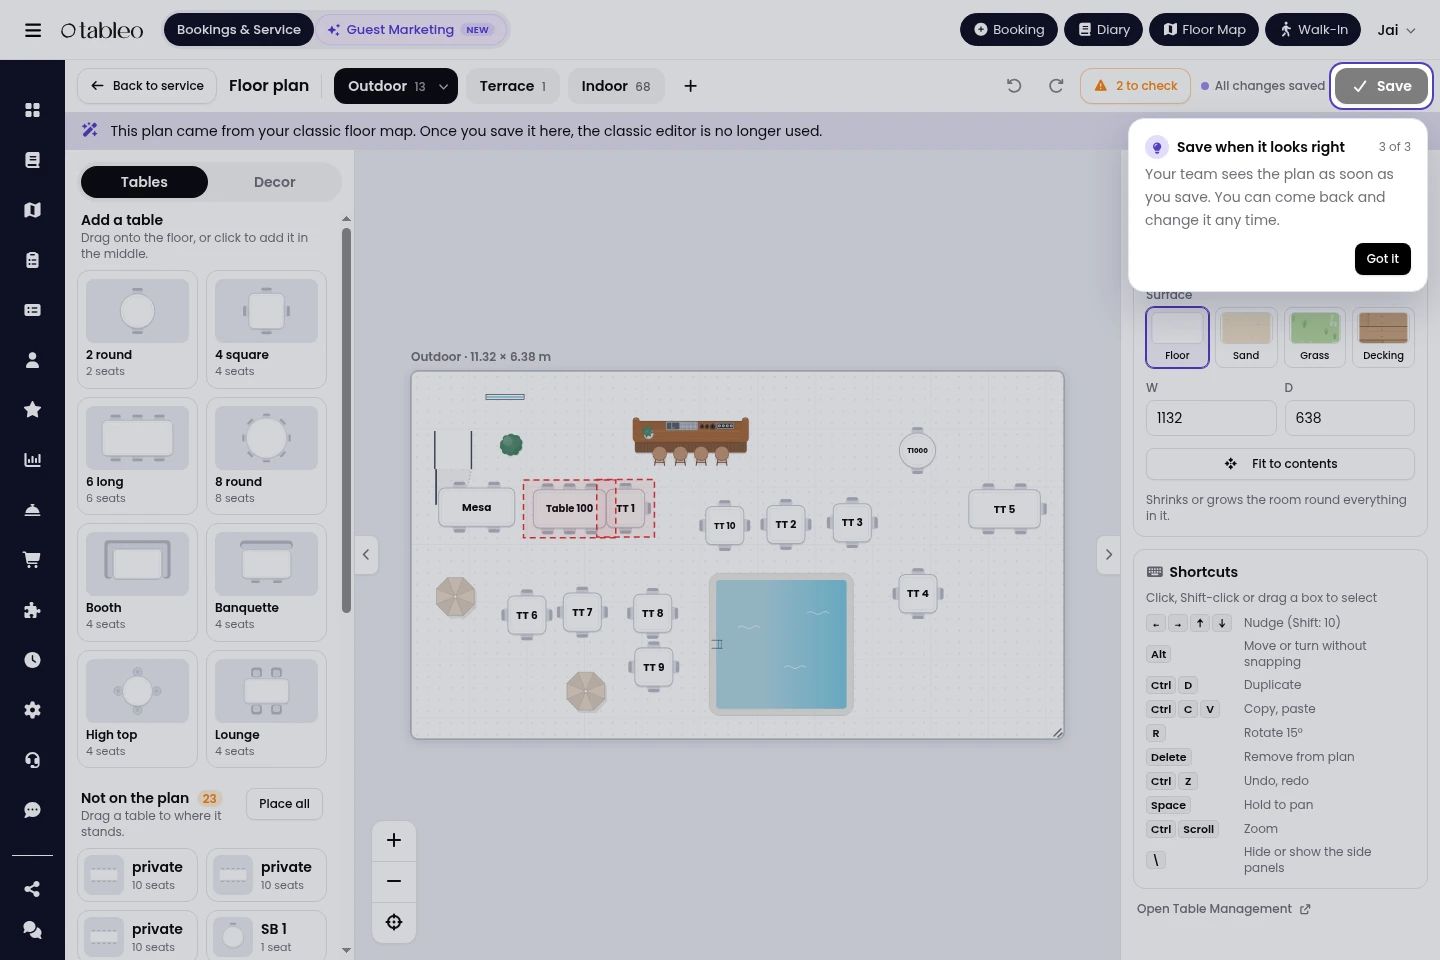
Browse the in-product tips for seating guests and setting up your floor plan. Use the arrows or swipe through the five screens, and select an image to enlarge it.

Understand the floor at a glance
The first question during service is often straightforward: where do we have space?
The new map makes free, reserved, occupied and unavailable tables visually distinct. Table states use text, symbols and borders alongside colour, so your team has more than a coloured shape to interpret.
As you zoom in, more detail becomes visible. Depending on the table’s state and the space available, you can see the guest’s name, covers, time seated and next booking. Zoom out to look across the room, then zoom in closer to the tables that need your attention.
The information follows the way you look at the floor: first the room, then the table, then the booking.
Tip: Pinch-to-zoom on a phone or tablet to move between an overview of the dining area and a closer view of individual tables.
Set up a floor plan your team recognises
A useful digital floor should look enough like your restaurant that a colleague can find the right table without translating between the screen and the room.
The redesigned web editor lets you create and edit the layout, arrange tables and use room elements to make the space recognisable. Keep table names consistent with the ones your team uses during service, and check the layout when you change the physical room.
Floor-plan editing is separate from live service actions. Moving a booking during service changes where its guests are assigned; it doesn’t rearrange the physical table positions on your map.
Welcome walk-ins easily
A couple walks in and you have a table ready. The immediate job is to seat them and make sure the booking is reflected on the floor.
The new walk-in flow lets you select a free table, choose the walk-in action and enter the number of covers. You don’t have to collect a name, email address or phone number before seating the party. Guest information can be added afterwards.
The table becomes occupied on the map, so the walk-in is part of your service picture alongside guests who booked ahead.
Upcoming bookings remain important here too. If the proposed seating creates a conflict, the floor brings it to your attention before you proceed.
Manage bookings where you’re already looking
When guests arrive, the floor map should help you act on the booking without losing sight of the room.
Select a table and the relevant actions appear with its booking and guest information. You can manage arrivals, move a booking, close a table, adjust the booking’s duration or add a staff note from the floor.
The actions change with the table’s state. A free table offers the actions you need to seat guests or block it. An occupied table brings forward the actions you need during service.
On a larger tablet layout, the reservation queue sits beside the map, with table details in a separate panel. You can keep the upcoming bookings and the floor in view together. On a phone, details open over the map when you need them, making better use of the smaller screen.
You can assign a reservation by selecting the booking and then its table. Drag-and-drop assignment is also available in the expanded tablet view.
Tip: When moving a booking, check the highlighted table options and any conflict information before choosing its new position.
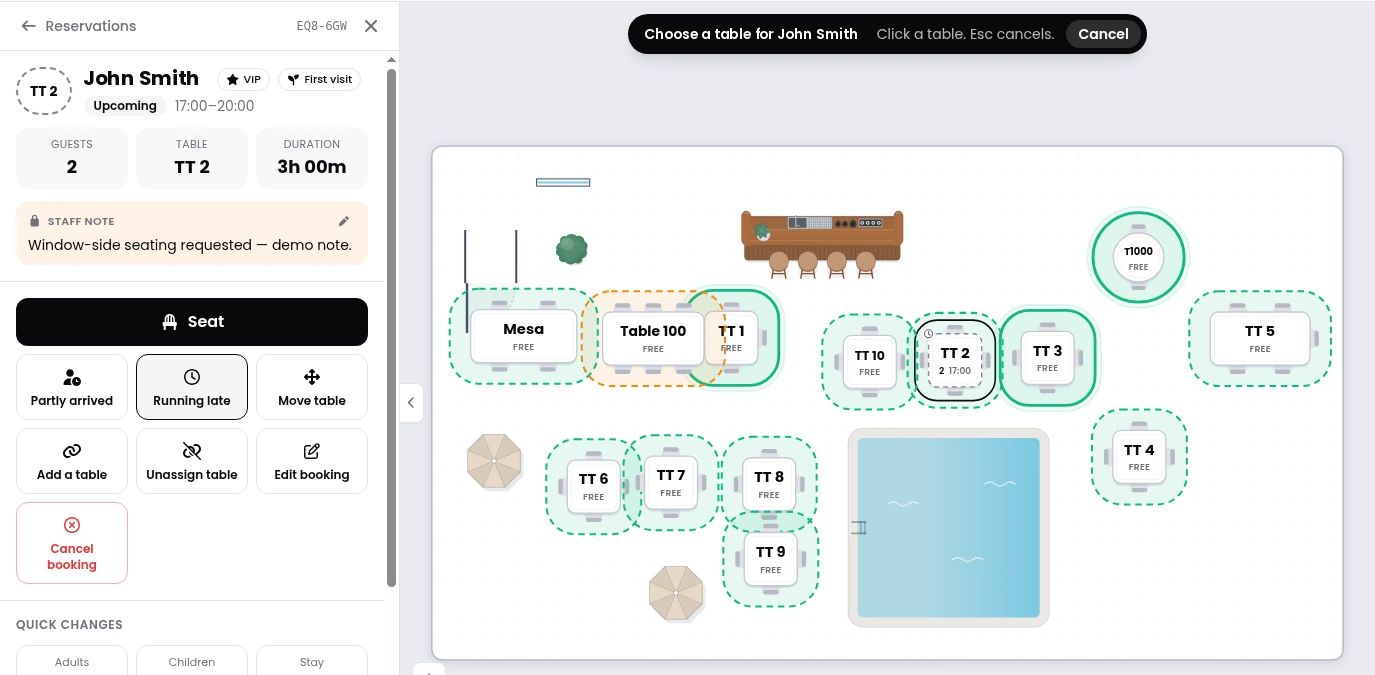
Keep guest details close to the table
Knowing where someone is sitting is only part of welcoming them well.
Guest badges bring recorded details such as VIP status, allergies, birthdays and accessibility requirements into view. Open the guest or booking details for the information behind the badge, and use staff notes to keep colleagues informed.
An allergy badge is a prompt to read the details and follow your restaurant’s usual checks with the guest and kitchen. A birthday indicator gives the team a useful heads-up before the greeting.
Search also helps you find a guest, booking reference or table without working through the whole floor. Selecting a result takes you to the relevant table or booking.

Keep up when the seating plan changes
A larger party needs two tables. Guests ask to move. A table needs to be held out of use for part of the evening.
The new floor map brings moving bookings, joining or splitting their table assignments, and blocking or unblocking tables into the service experience. Your team can update the seating arrangement as the room changes.
For actions that support it, you are able to reverse a recent change with the undo button. Where a move or an extension would conflict with another booking, the warning explains the problem so you can decide how to handle it.
See how long a free table is available
An empty table can still have a booking due shortly. Before you offer it to a walk-in, you need to know how much time you have.
The new floor map shows the next booking and the available window on a free table. You can make the seating decision with the upcoming reservation in view, rather than checking the room and then searching the diary separately.
For occupied tables, elapsed seating time and expected availability help you keep track of the sitting. If a table runs over or threatens the next booking, warnings draw attention to it.
Imagine a couple asking for a table while you’re preparing for the next sitting. Seeing that a table is free for a limited time helps you decide whether to offer it, find another table or explain the timing before they sit down.
The expected finish time helps you plan the next sitting, including time to clear and reset the table.
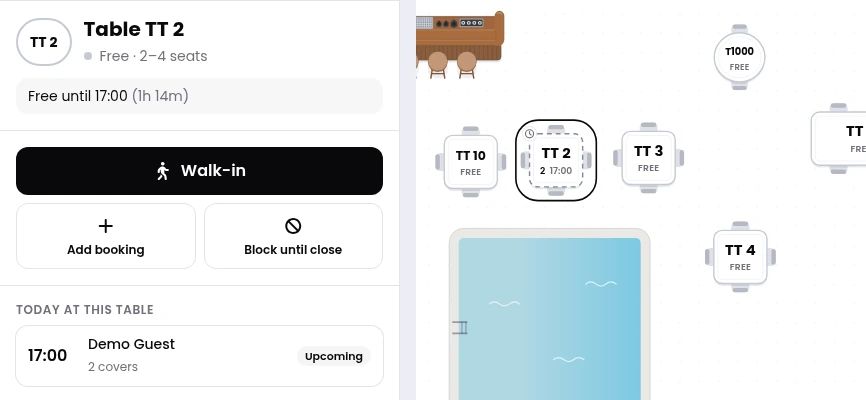
Move between the host stand and the floor
The new floor map comes to phones and tablets in Tableo Manager, alongside a complete rebuild of the existing web floor map.
A larger screen gives the host stand room for the queue, map and table details together. A phone keeps the map central and opens the detail you need as you select a table. Dining-area controls let you move between rooms, such as the main restaurant and terrace, with capacity information to help you see where there is space.
Changes made on another connected device update on the floor, helping colleagues work from the same service information. The connection indicator shows when the floor is live or when its information was last updated.
Before your next service
Open the new floor map and walk through your dining areas with the team. Check where to find the next booking, seat a walk-in and move a reservation. Agree who updates arrivals and finishes tables, so the map reflects what is happening in the room.
Try it during a quiet moment first. Then use it at the host stand for your next service, with everyone clear on the actions they’re responsible for.


